

Table of Contents:
Related Stories


Discover budget-friendly smart home automation hacks and learn how to automate your entire home with platforms like HOOBS VS HomeBridge. In today’s fast-paced world, home automation is no longer a luxury reserved for the tech-savvy elite. With the rise of affordable smart devices, it’s easier than ever to transform your home into a smart haven. However, automating your entire home on a budget can be challenging, especially when choosing the right platform.
In this blog post, we’ll explore how you can automate your home without breaking the bank, focusing on cost-effective smart home hacks and comparing popular platforms like HOOBS and HomeBridge. #HomeBridge #Hoobs #RaspberryPi #HomeAutomation

Why Automate Your Home?
Home automation offers numerous benefits, including convenience, energy efficiency, security, and increased property value. Imagine controlling your lights, thermostat, security cameras, and even your coffee maker with just a tap on your smartphone or a voice command. Home automation can simplify your daily routines, reduce energy consumption, and provide peace of mind by enhancing your home’s security.
Key Components of a Smart Home
Before diving into the specifics of home automation platforms, let’s first understand the essential components of a smart home:
Smart Hub: The brain of your smart home, a smart hub connects and controls all your smart devices. Popular options include Amazon Echo, Google Nest Hub, and Apple HomePod.
Smart Lights: From dimmable bulbs to color-changing LEDs, smart lights allow you to create the perfect ambiance in any room.
Smart Thermostats: Devices like the Nest Learning Thermostat or Ecobee can help you save on energy bills by optimizing your home’s heating and cooling.
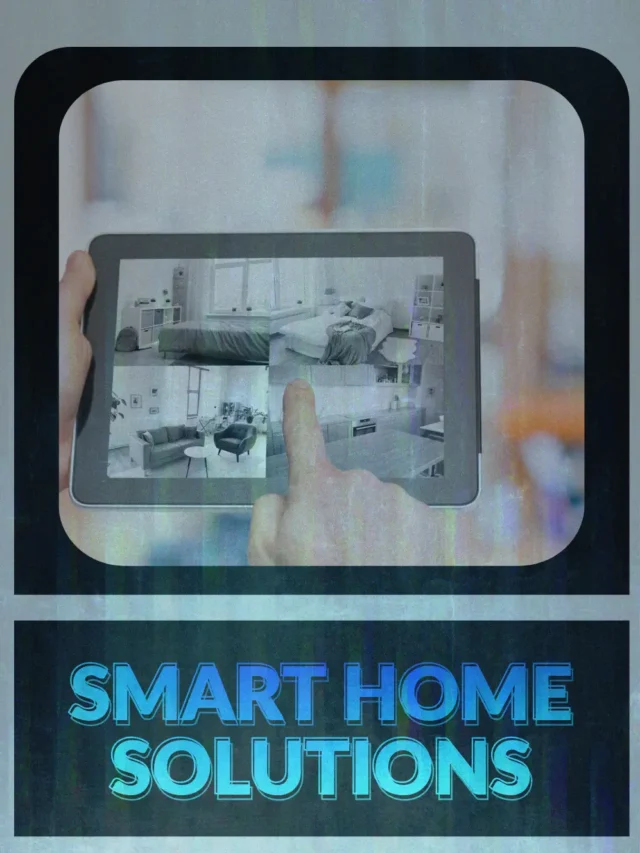
Smart Security: This includes smart cameras, doorbells, locks, and sensors to monitor and secure your home.
Smart Plugs and Switches: These enable you to control non-smart devices remotely.
Voice Assistants: Voice-controlled assistants like Alexa, Google Assistant, or Siri can integrate with your smart home system for hands-free control.
Home Automation Platforms: HOOBS vs. HomeBridge!
When it comes to automating your home on a budget, choosing the right platform is crucial. HOOBS and HomeBridge are two popular platforms that allow you to integrate and control a wide range of smart devices, even those that aren’t natively supported by Apple HomeKit. Let’s compare these platforms to help you decide which is best for your needs.
HOOBS (Option#1 Out of the Box System)
HOOBS is a plug-and-play solution designed to simplify the process of setting up a HomeBridge server. It’s a small, affordable hub that makes it easy to integrate non-HomeKit devices with Apple’s Home app.


User-Friendly Interface: HOOBS offers a user-friendly web interface that simplifies the installation and management of plugins, making it accessible to beginners.
Pre-configured: HOOBS comes pre-configured, so you don’t need to worry about the technical aspects of setting up a HomeBridge server.
Extensive Plugin Library: HOOBS supports thousands of plugins, allowing you to integrate a wide variety of smart devices into your HomeKit setup.
Cross-Platform Compatibility: While HOOBS is designed for Apple users, it also supports other platforms, making it a versatile choice.
Price: HOOBS is relatively affordable, especially considering the convenience it offers. The cost typically ranges from $200to $500, depending on the model and accessories. Check out HOOBS official website for details.
HOOBS (Option#2 DIY Raspberry Pi)
Turning your Raspberry Pi into a smart home hub is a cost-effective way to integrate non-HomeKit devices with Apple’s Home app. HOOBS offer powerful solutions for home automation enthusiasts, allowing you to control a wide range of smart devices through a single platform. In this post, we’ll walk you through the process of configuring HOOBS on a Raspberry Pi, providing detailed instructions to get your smart home up and running.
What You’ll Need
Before you begin, make sure you have the following:
A Raspberry Pi (Raspberry Pi 3 or later recommended)
A microSD card (16GB or higher)
A microSD card reader
A power supply for the Raspberry Pi
An Ethernet cable (optional, but recommended for stable network connection)
A keyboard, mouse, and monitor (for initial setup)
An internet connection
Step 1: Prepare Your Raspberry Pi
1. Download Raspberry Pi OS
Start by downloading the latest version of Raspberry Pi OS from the official Raspberry Pi website. Choose the “Raspberry Pi OS Lite” version if you prefer a command-line interface, or the “Raspberry Pi OS with Desktop” version for a graphical interface.
2. Flash the OS to the microSD Card
Use a tool like Raspberry Pi Imager to flash the Raspberry Pi OS onto your microSD card. Insert the microSD card into your reader, open the Imager, select the OS image, choose the microSD card as the target, and click “Write.”
3. Set Up Your Raspberry Pi
Insert the microSD card into your Raspberry Pi, connect the keyboard, mouse, and monitor, and power on the device. Follow the on-screen instructions to set up your Raspberry Pi, including configuring your Wi-Fi connection and updating the system.
Step 2: Install and Configure HOOBS on Raspberry Pi
HOOBS offers a streamlined way to get started with HomeBridge. Here’s how to install and configure it on your Raspberry Pi.
1. Download the HOOBS Image
Visit the HOOBS official website and download the HOOBS Raspberry Pi image. This image is pre-configured with everything you need to run HOOBS on your Pi.
2. Flash the HOOBS Image to the microSD Card
Use Raspberry Pi Imager or a similar tool to flash the HOOBS image onto your microSD card, similar to how you did with the Raspberry Pi OS.
3. Boot Up and Access HOOBS
Insert the microSD card into your Raspberry Pi, connect it to the network, and power it on. HOOBS will boot up, and you can access the HOOBS dashboard by opening a web browser and entering http://hoobs.local (or the Raspberry Pi’s IP address) into the address bar.

4. Set Up HOOBS
Follow the on-screen instructions to complete the initial setup of HOOBS. This includes setting a username and password and configuring your first plugins. HOOBS offers an intuitive web interface, making it easy to install plugins for your smart devices.

5. Install Plugins
Search for and install plugins for the devices you want to integrate into your HomeKit setup. HOOBS simplifies this process by providing a vast library of plugins with detailed instructions.

6. Test and Configure
Once your plugins are installed, test the integration by opening the Apple Home app on your iPhone or iPad. Your non-HomeKit devices should now appear in the app, allowing you to control them alongside your HomeKit devices.
Homebridge!

HomeBridge is an open-source software that acts as a bridge between non-HomeKit devices and Apple’s Home app. Unlike HOOBS, HomeBridge requires more technical knowledge to set up and maintain, but it offers greater flexibility.
Customization: HomeBridge allows for a high level of customization, giving advanced users full control over their home automation setup.
Cost-Effective: Since HomeBridge is free, it’s an excellent choice for those on a tight budget. You only need a Raspberry Pi or a similar device to run the software.
Large Community Support: Being open-source, HomeBridge has a large and active community that regularly develops and updates plugins.
Requires Technical Skills: Setting up HomeBridge can be challenging for beginners, as it involves command-line interface (CLI) operations and manual plugin installation.
Flexibility: HomeBridge’s flexibility allows it to support a broader range of devices and configurations compared to HOOBS.
Install and Configure HomeBridge on Raspberry Pi
HomeBridge offers a more customizable experience, but it requires some technical know-how. Follow these steps to install and configure HomeBridge on your Raspberry Pi.
1. Install Node.js
HomeBridge requires Node.js to run. Open the terminal on your Raspberry Pi and enter the following commands to install Node.js:
bashCopy codecurl -sL https://deb.nodesource.com/setup_16.x | sudo -E bash -
sudo apt-get install -y nodejs
2. Install HomeBridge
Next, install HomeBridge globally on your Raspberry Pi using npm (Node Package Manager):
bashCopy codesudo npm install -g --unsafe-perm homebridge homebridge-config-ui-x
3. Set Up HomeBridge as a Service
To ensure HomeBridge runs automatically in the background, set it up as a systemd service:
bashCopy codesudo hb-service install
4. Access the HomeBridge Web Interface
HomeBridge comes with a web interface for managing plugins and configurations. Open a web browser and go to http://<your-pi-ip>:8581. The default username is admin and the password is admin.
5. Install Plugins
Just like with HOOBS, you’ll need to install plugins for your devices. Search for plugins using the web interface and follow the instructions to configure each one.
6. Configure the config.json File
HomeBridge requires a config.json file to function. This file contains the configuration settings for your plugins and devices. The HomeBridge web interface simplifies this process, but you may need to manually edit the file for advanced configurations.
7. Test Your Setup
After installing and configuring your plugins, open the Apple Home app to see if your devices appear. Test each device to ensure they are working correctly.
Smart Home Hacks on a Budget!
Now that you have an idea of the platforms available, let’s explore some budget-friendly smart home hacks to get the most out of your automation setup.
1. Use Smart Plugs for Non-Smart Devices
Not all your devices need to be “smart” to be part of your automated home. Smart plugs are an inexpensive way to control lamps, fans, coffee makers, and other appliances remotely. Simply plug your device into a smart plug, and you can schedule or control it from your phone.
2. Repurpose Old Devices
If you have old smartphones, tablets, or even laptops lying around, consider repurposing them as control panels or security cameras. Apps like Alfred and Manything can turn your old devices into smart home accessories, saving you money on buying new equipment.
3. DIY Motion Sensors
Create your own motion sensors using affordable PIR (Passive Infrared) sensors and connect them to a smart hub like Raspberry Pi. These sensors can be used to automate lights, alert you of intruders, or even monitor the temperature.
4. Automate with IFTTT
IFTTT (If This Then That) is a free web-based service that lets you create automation “recipes” between different smart devices and services. For example, you can set up an IFTTT applet to turn on your lights when your smart lock is unlocked.
5. Optimize Energy Usage
Use smart thermostats and energy monitoring plugs to track and optimize your energy usage. Many of these devices can learn your habits and automatically adjust settings to save energy, reducing your utility bills.
Integrating Your Smart Devices!
The key to a seamless smart home experience is integration. Both HOOBS and HomeBridge allow you to integrate various smart devices into a single platform, enabling centralized control. Here’s how you can integrate your smart devices:
Start with a Hub: Choose a smart hub compatible with the majority of your devices. If you’re using HomeKit, HOOBS or HomeBridge will be essential.
Install Plugins: Depending on your platform, install the necessary plugins to connect your devices. HOOBS simplifies this process with its intuitive interface, while HomeBridge offers more customization options.
Configure Automation: Set up automation rules and scenes to control multiple devices simultaneously. For example, create a “Goodnight” scene that turns off all lights, locks the doors, and adjusts the thermostat with a single command.
Test and Adjust: Regularly test your automation setup and make adjustments as needed. This will help ensure that everything works smoothly and meets your needs.
External References
For more information and resources on smart home automation, check out the following links:
Conclusion
Automating your home doesn’t have to be expensive or complicated. By choosing the right platform and employing budget-friendly smart home hacks, you can create a connected and efficient home without breaking the bank. Whether you opt for the user-friendly HOOBS or the customizable HomeBridge, both platforms offer powerful solutions to bring your smart home vision to life.
By following the tips and strategies outlined in this post, you can take control of your home automation journey and enjoy the benefits of a smart home on a budget.


